Task lifecycle
| Collaborative Authoring | ||
|---|---|---|
| Previous | Next | |
| Mapping | Getting started with semantic queries | |
Snow Owl has been architected from its inception to enable users to author terminologies in a distributed and collaborative fashion. Users can work in the same location or can be geographically distributed, as long as they have network access to a central Snow Owl terminology repository. In order to coordinate the efforts of multiple authors concurrently editing the same ontology, separate tasks can be assigned to them.
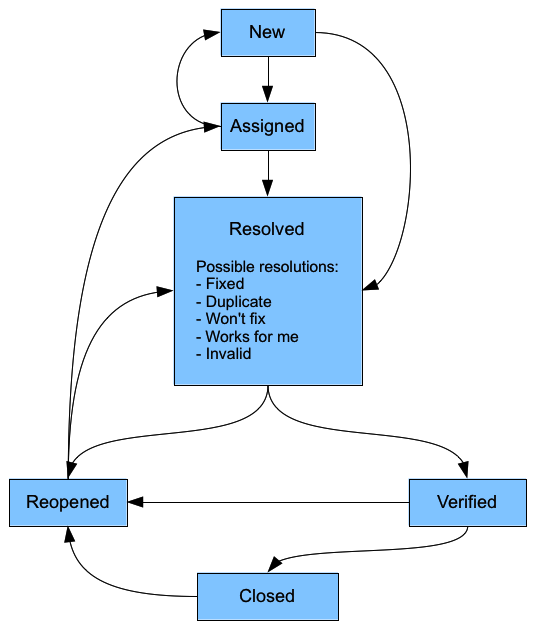
Tasks have a life cycle that spans from their initial creation through an authoring and reviewing stage to their final approval. The process involves multiple users having different work areas and levels of authority. Here is an example for a lifecycle:
Changes are not visible to other authors until the very end of the workflow, when they have been approved. However, all authors working on the same task see the changes made by any other authors working on that task.
As indicated in the sample workflow pictured below, the workflow can be reversed at any part of the process, e.g. the reviewer can reopen the task if not satisfied with the changes made.
The task lifecycle is configurable and can be adapted to meet specific workflow requirements: Several authors can be involved in the same task which is called dual-independent authoring. It's also possible to work with a smaller number of users, e.g if reviewing and approving is done by the same person.
In order to collaborate with other users you need to set up a remote task repository, which is used to create and manage tasks.
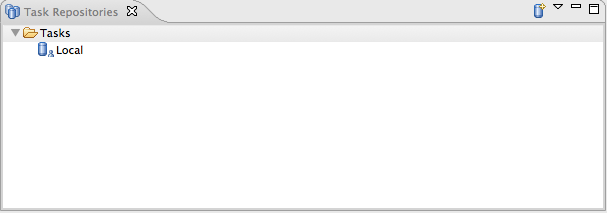
To add the task repository to Snow Owl, you have to open the Task Repositories View:
This will bring up the Task Repositories View in the bottom section of your screen. It displays local and remote task repositories.
To add a new repository:


The new repository will now be displayed in your Task Repository view.
You can create either local tasks, which are not visible to any other users, or remote tasks. Even when working alone, it is useful to create local tasks so that all changes for the task can be saved at once or ignored.
To create a new task you can either
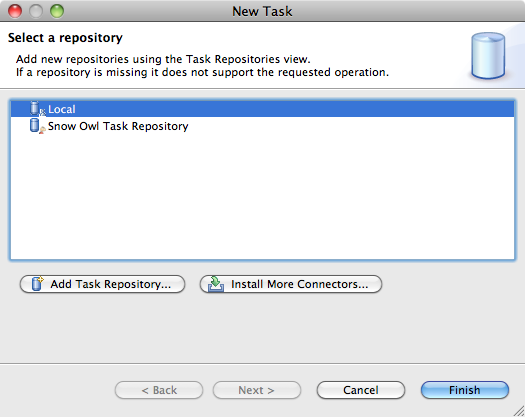
This will bring up the New Task dialog where you can select your remote task repository from the list and click Finish.
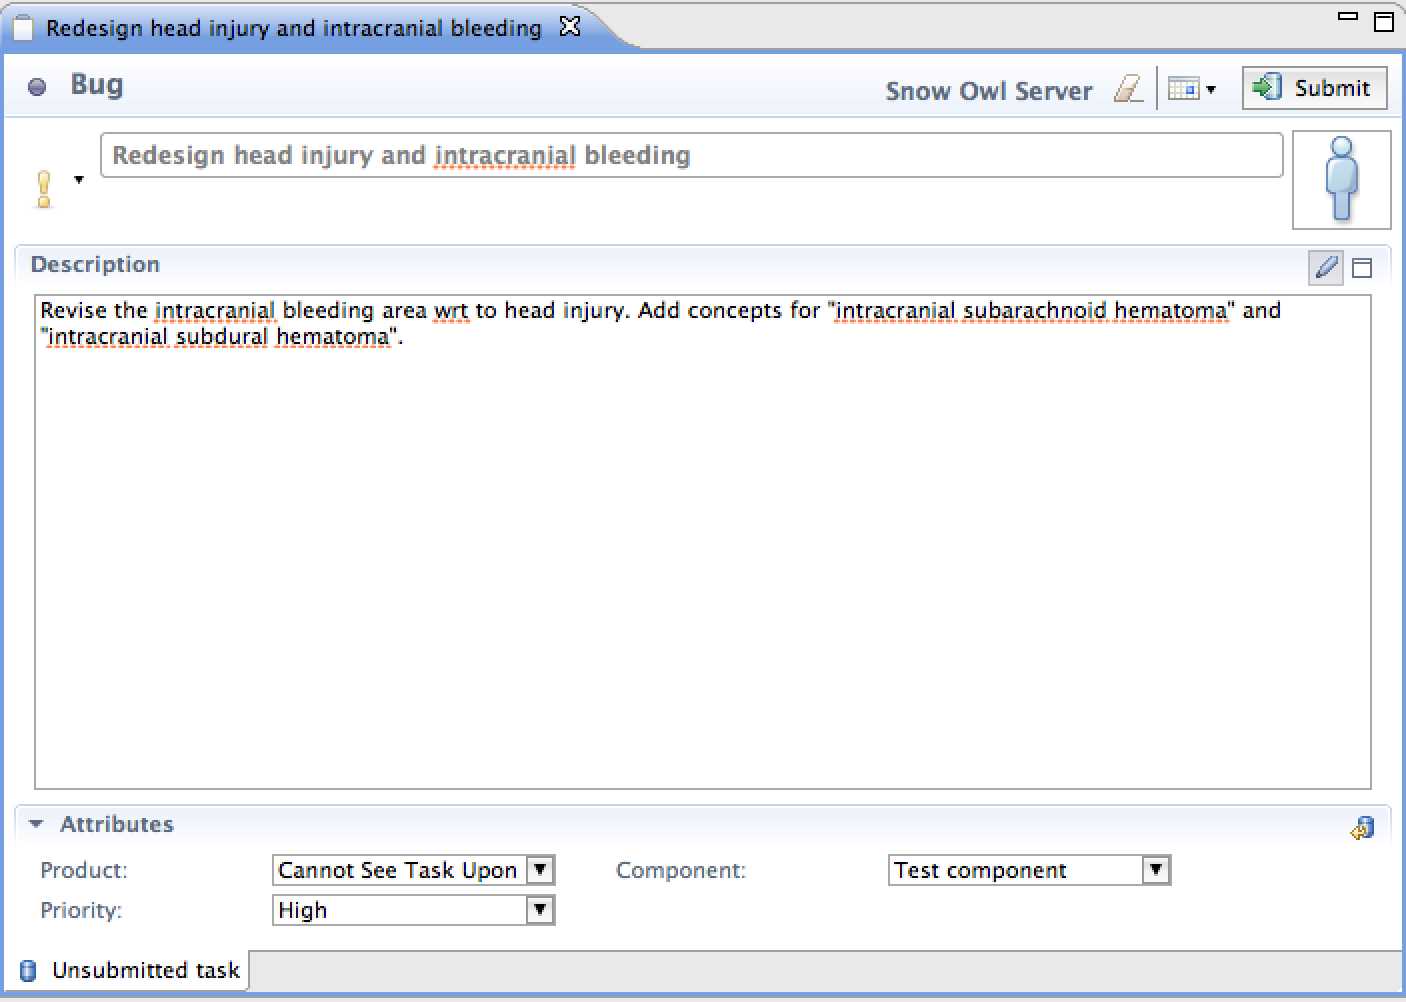
The newly created task will be opened in an editor which is comprised of
If you want to
create a local task that is saved on your computer and only visible to you, click the save button in the main tool bar. The task will be stored in the "Unsubmitted" folder of your task list where you can access it again, e.g. to make changes before submitting it to the remote repository. You can use the buttons in the toolbar to schedule
![]() the task or to remove it
the task or to remove it
![]() .
.
Once you are ready to
submit the task to the remote repository click the
Submit button
![]() at the top right of the editor. This will move the task from your local system to the remote sever where your team members can view it. You will notice that the user interface of the task editor changes once you submit a task enabling a different set of actions. A consecutive issue number will be automatically created and displayed in the title. Submitted task are filed in the remote repository folder of the task list.
at the top right of the editor. This will move the task from your local system to the remote sever where your team members can view it. You will notice that the user interface of the task editor changes once you submit a task enabling a different set of actions. A consecutive issue number will be automatically created and displayed in the title. Submitted task are filed in the remote repository folder of the task list.
Tasks can be submitted directly to the repository, it's not necessary to save them locally first.
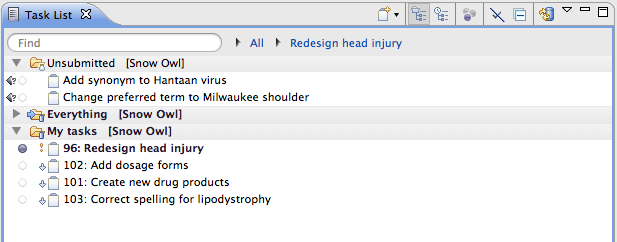
The task list view displays two kinds of tasks:
Double-clicking on a task in the task list will open a task in the task editor. Since local tasks require different actions than remote tasks the user interface of the task editor adapts respectively. In the previous section we discussed the task editor for local tasks, in this section we will take a look at the task editor for submitted tasks.
The editor for submitted tasks consists of the following sections:
You can access the Task Repository dialogue by clicking on the name of the repository (here Snow Owl) in the.
There other buttons in the toolbar of the task editor have the following functions:
The task list allows you to manage and organize your tasks. By default local and remote tasks will be displayed in separate folders, but you can also create your own queries to group the tasks according to your needs (e.g. My tasks, Unsubmitted tasks).
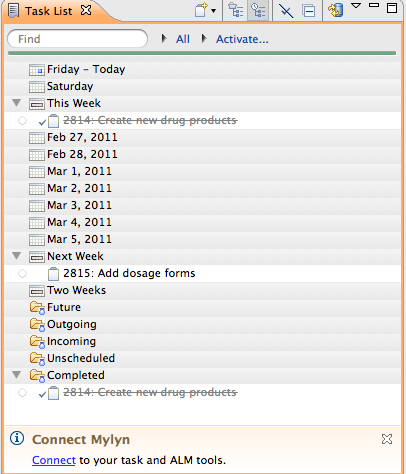
Tasks can also be organized by other criteria, for example your schedule. You can switch between the options by using the buttons in the toolbar:
Other functions that can be directly accessed from the toolbar are
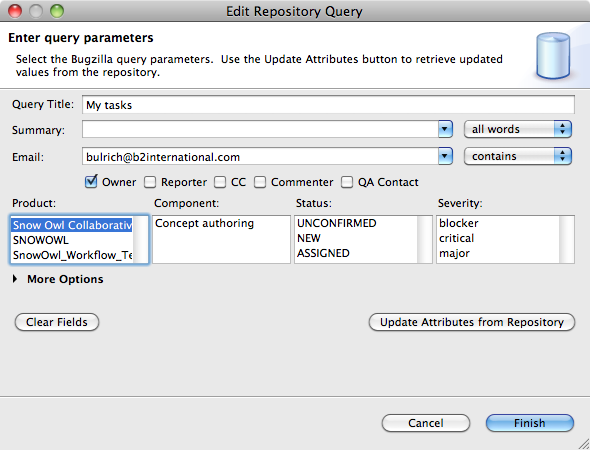
Queries allow you to filter the tasks according to your specifications. When you create a query, a folder will be added to your task list that contains only the tasks that meet your search parameters. Once you've created a query, you can update results by pressing the synchronize button
![]() . This allows you to always keep up to date with the tasks you are working on.
. This allows you to always keep up to date with the tasks you are working on.
To create a query
A new folder for your query will be displayed in your task list.
The task list can be used to schedule your tasks for the week by assigning them to a particular day.
Click on the
Scheduled button in the view's toolbar
![]() to see the upcoming dates along with the assigned tasks, their due dates, or desired completion times.
to see the upcoming dates along with the assigned tasks, their due dates, or desired completion times.
There is a variety of configuration options within the tasks view to help keep you focused and improve your productivity. To access the Task UI legend click the small triangle in the toolbar > Show UI Legend

Further details about the Task UI Legend are discussed in the Tasks User Guide, which you can access via Help > Help Contents > Tasks User Guide.
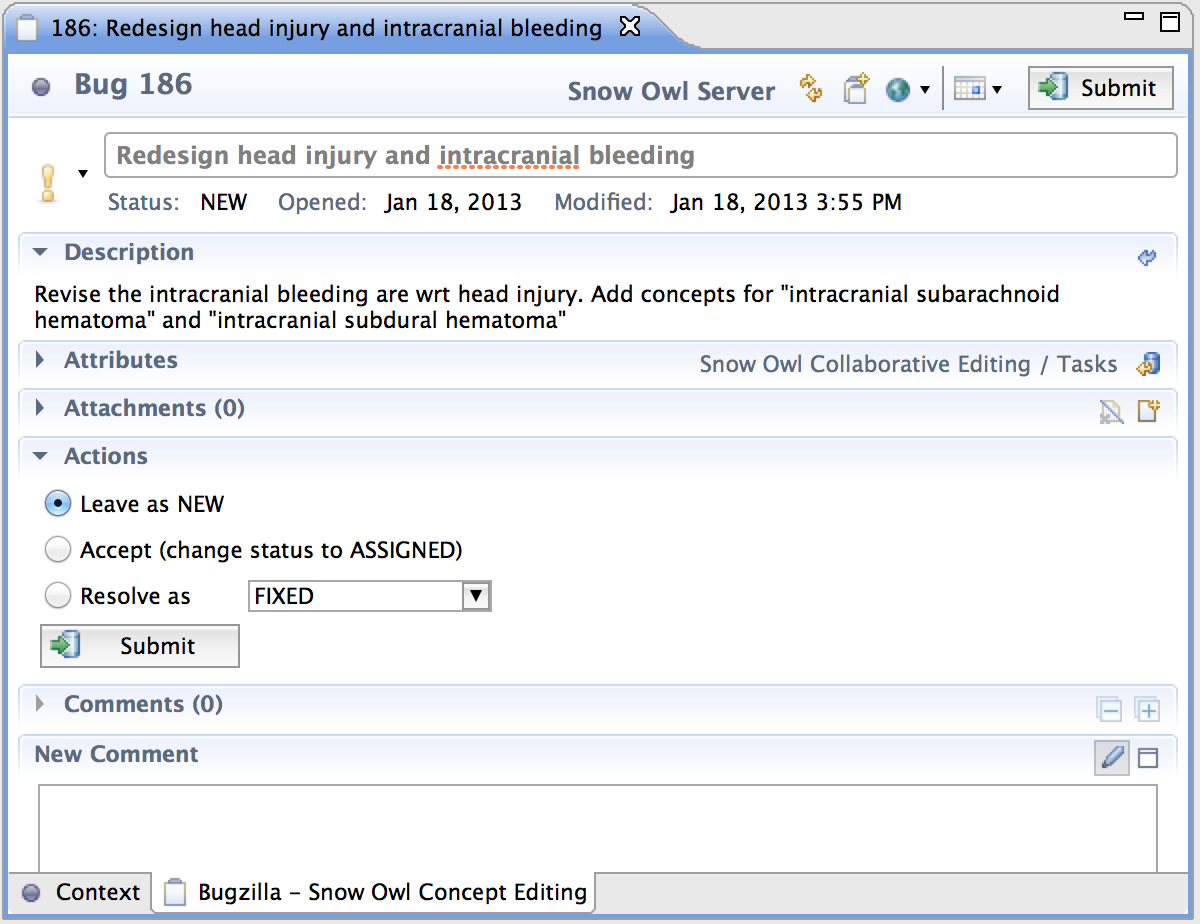
Once you have decided which task you are going to work on, you need to activate that task. Activating the task means that you entered the collaborative mode, and the changes you are making are only visible to other users that have the same task activated. To activate your task you need to click the small circle to the left of the task icon in the Task List view or click the circle next to the task name in the task editor.

The branching arrow and the id of the task in the status bar indicates that you are working on a task in a collaborative mode. You can now start editing the ontology. When you are working on a task, the comment at save is automatically generated from the task's summary, so you are not prompted to comment your modifications.

The modifications will not be submitted to the main repository until the two-level review process is completed, it will only be available for those who are working on the same task and have activated it.
During editing you get notifications on the bottom right of your screen regarding:
The information includes the date and time of the modification, the editor's username and the related comment. It also includes an avatar of the user making the change. For the avatar to appear, it must be registered at http://gravatar.org with your email address.
When you are working on a task, changes made by other users working on the same task will be transparently synchronized. If this is not possible, such as when you have made some conflicting changes to the same concept, you will receive a notification of the user that made the conflicting change and will be prompted to refresh your editor.
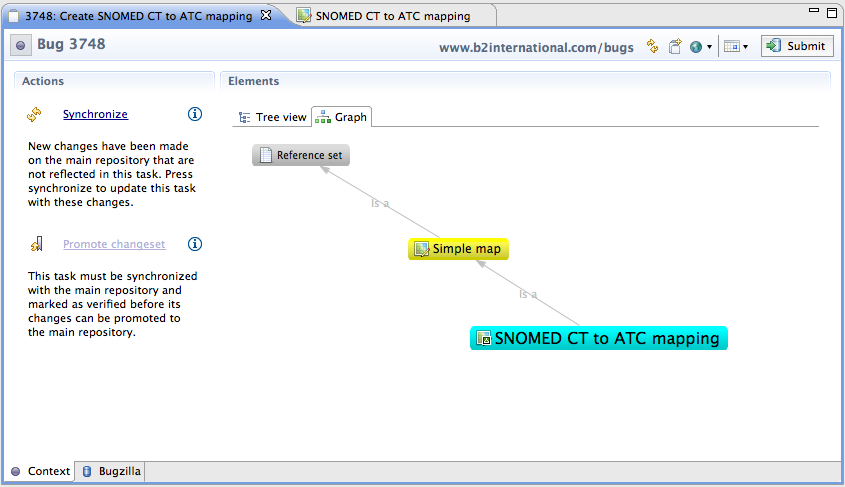
You can manually synchronize your task with any changes that have occurred on the main repository at any time. To see if there are any outstanding changes on the main repository, you can check the context tab of the task editor. If the synchronize button is enabled on the left hand side, that means that there were changes on the main repository that aren't reflected in your task.

In addition, Snow Owl's semantic cache is transparently synchronized with remote repository changes when an off-line user connects to a remote repository.
On the context tab of the task editor you can follow up with the changes that were made while the task were active. It is displaying the relevant parts of the concept hierarchy: if a concept, or any component associated with it has changed, it is added to the context with its parentage. If you hover the cursor over this concept you can see the types of modifications on a tooltip. If a reference set was edited, the modifications appear in the same SNOMED CT hierarchy, attached to the reference set identifier concept.
In addition to the Tree view you can browse the contents of the context in a graphical format. The icons associated with the changed concepts have a small additional icon indicating if they have been added, changed, or deleted/inactivated.
If the synchronization reveals any changes that happened on the main repository and are conflicting with the changes in the task context, you get a notification that lists the affected components. To continue editing or making progress with the workflow you need to revert your changes on the task.
For example, if your task was to create a reference set with some members and the concept that is a referenced component of any of the members was deleted from the main repository, you need to remove that reference to the concept from the reference set.
If you finished working with the task the following steps are necessary to take to push the workflow forward:
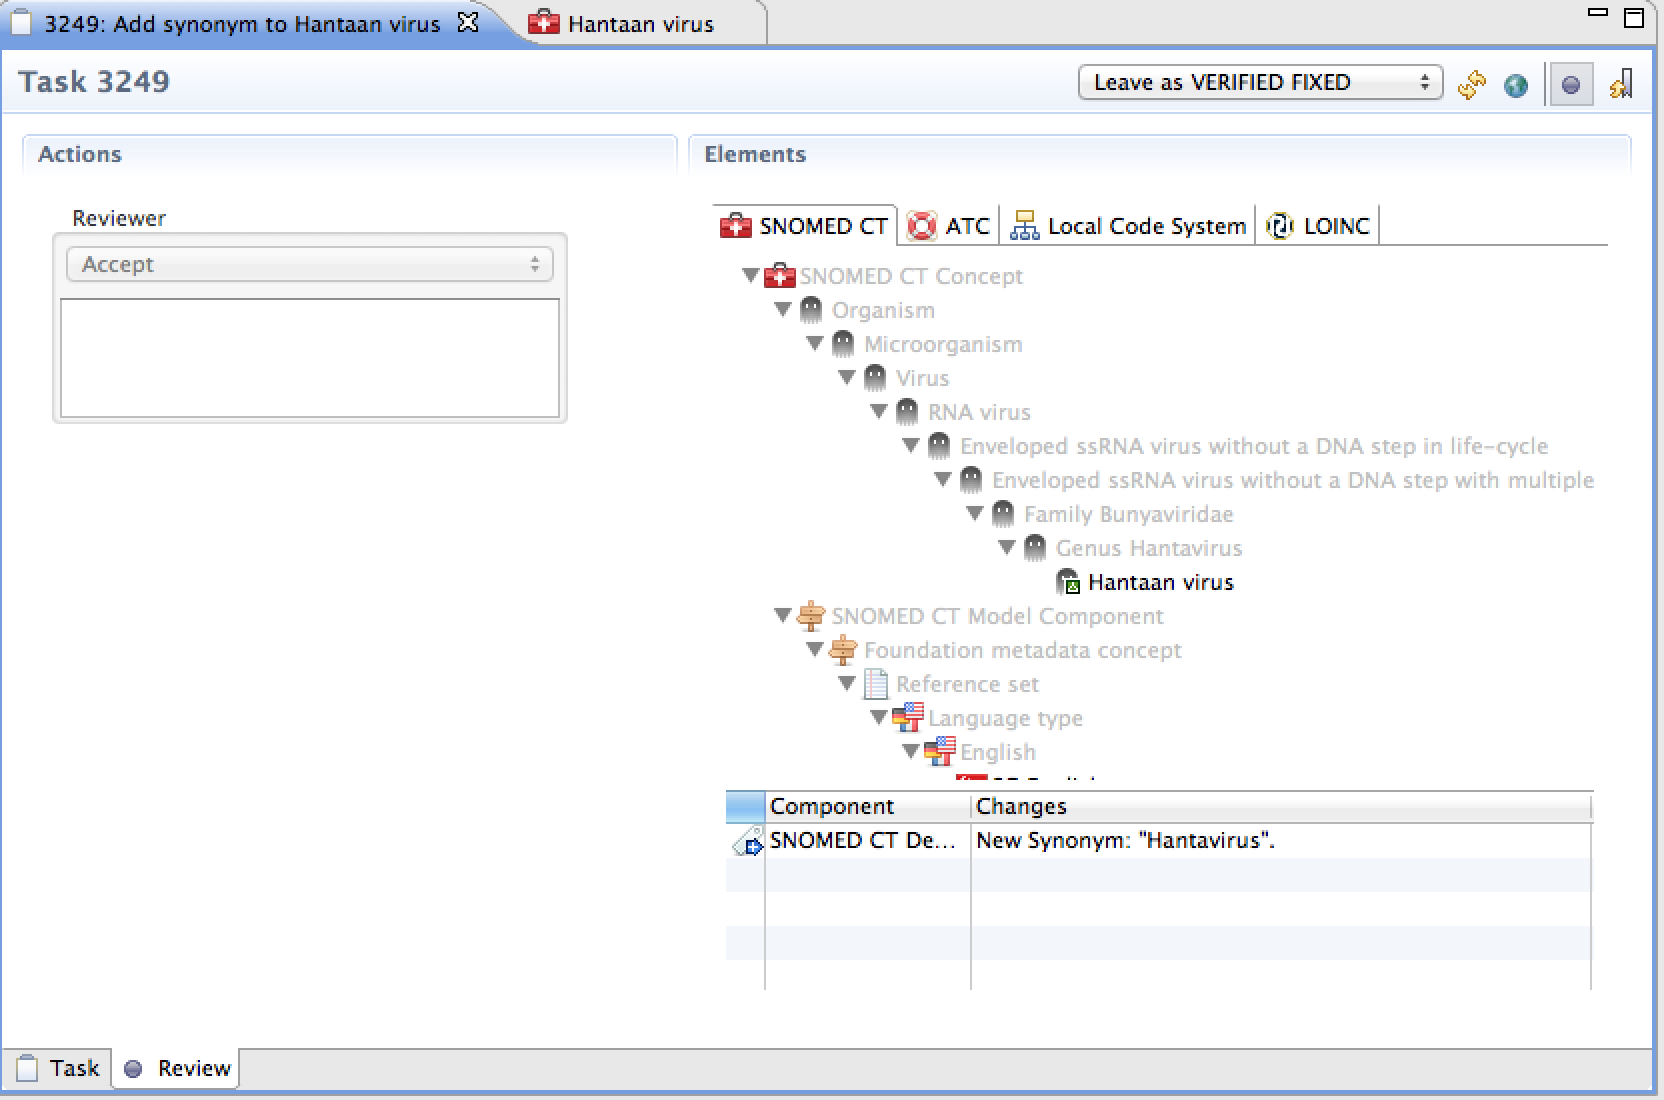
If your role is a reviewer you first meet the task when it is already in a Fixed state. You can scan through the changes on the context tab of the editor, but to be able to view the components that were created or changed in the context of the task you need to activate it.
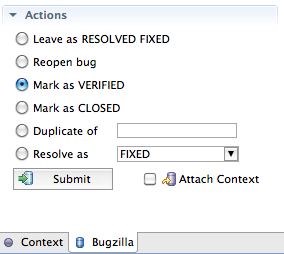
The reviewer can set the task state as verified, or reopen it in the editor for further elaboration.
After a task reached the Verified state it is ready to be promoted and committed into the main repository. You need to click on Promote on the context tab. If it is disabled that means that the taskhave not been reviewed and verified, or that there were changes on the main repository that aren't reflected on the task and you need to synchronize first.
After a successful promotion the lifecycle of the task gets to the end: the tasks state changed to Closed and it inactivates itself. From this point it cannot be reopened anymore.
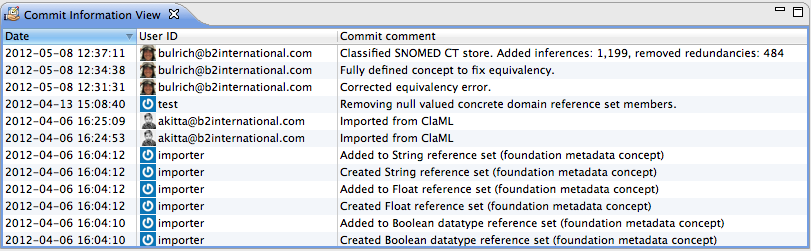
Once the task has been promoted it is visible in the Commit Information View. This view displays date and time of the change, the user, and their commit comment. It's quite useful to see the changes that other team members have made to the repository.
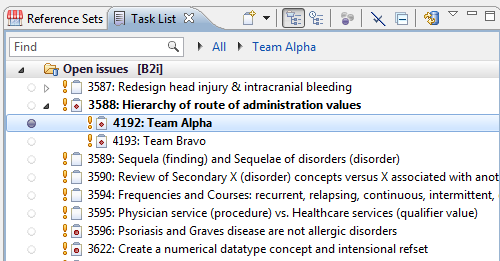
Dual-independent authoring means that two authors are working independently on the same task. The advantage of dual-independent authoring is that the work results can be reviewed and compared, which contributes to more valid outcomes.
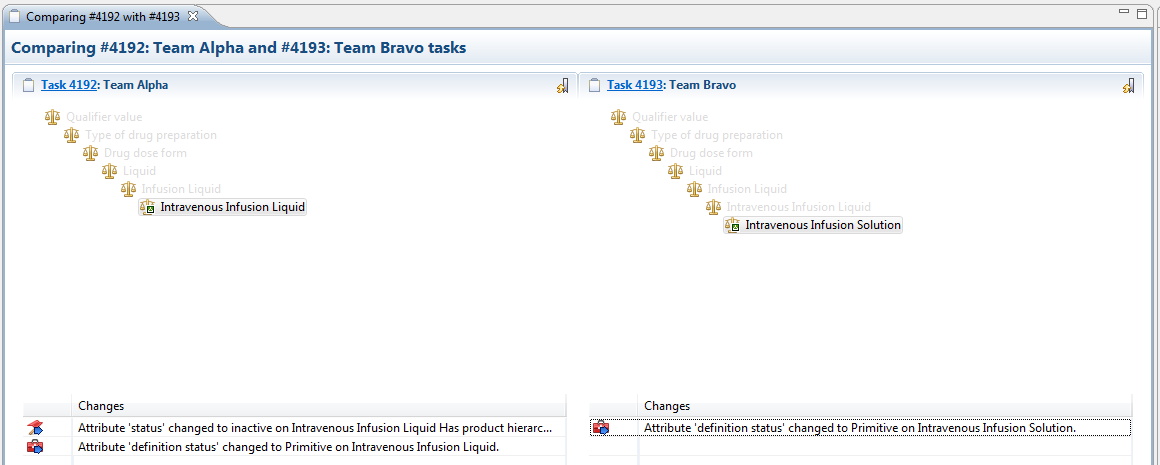
To start the process, a parent task is created that is used to accept one of two independently authored child tasks. Each child task can be assigned to a different author for completion. When each of the child tasks have been completed, the reviewer can compare the two child tasks by right-clicking the parent task and selecting Compare Subtasks.
This opens a task comparison window that displays both tasks next to each other. The top part of each task displays a tree view of all concepts changed or created as part of the task. A small icon overlaying the concept's icon indicates an addition (+), deletion (-), or change (delta). The selecting an item in the top part of the window displays details of the changes in the bottom section.
If either of the tasks is satisfactory, the reviewer can click the Promote Task icon on the desired task. This will promote the task to the Main repository and close the parent task.
If the tasks are unsatisfactory, the reviewer can add a description and reopen the task for additional editing work.
| Previous | Top | Next |
| Mapping | Getting started with semantic queries |