
Selecting a version
| New features | ||
|---|---|---|
| Previous | ||
| Snow Owl 2.7 New and Noteworthy | ||
It's now possible to undo changes that were saved. To revert to a previous version of your work, go to the Commit Information view. Right-click on a version and select Revert to to see what kind of changes were made between the selected version and the latest one.
You can click an item in the tree to review the details. Hit Finish to confirm and revert your changes.

If you just want to undo your latest changes (going back to the version you had before you saved), simply pick the second item in the list in the Commit Information view. This also works if you undid something unintentionally. The further down a version is in the list, the more changes will be affected. You can only go back in time in a linear way, this means all changes that happened after a selected version will be deleted. It's not possible to delete one change and keep the other.
Note: Commit comments might be a better indicator than (automatically created) time stamps to find the correct version, especially if you saved multiple times. For this reason, it's useful to write a commit comment whenever you save a change.
Important: Reverts are strictly to correct consecutive small changes within the ontology. Reverting the ontology to a previous state will erase every change made to the ontology to the point of the revert. Revert is not meant to be executed against large changes such as imports, or generated ontologies.
Tasks can now be created by using the task wizard, which provides a step-by-step interface that facilitates entering tasks. The following artifact types are supported:
Depending on the work scenarios, the task wizard creates different task configurations.
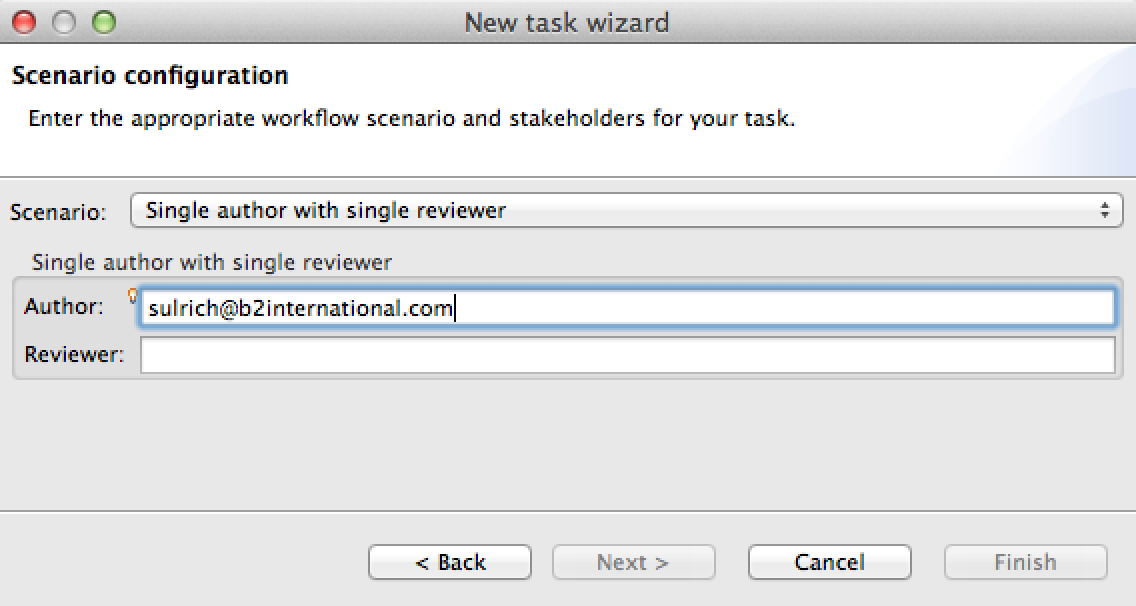
A single author is performing a task, the single reviewer can accept the entire work or parts of it (e.g. reference set members). The task wizard creates one task with following configuration:
Two authors are working on the same component simultaneously by dividing the workload. The task wizard is creating one task that can be activated by both authors. The following task configuration is created:
Two authors are working on the same task independently. They complete the entire task, and can not see what the other author is doing. After completion the reviewer can see the artifacts side-by-side for both authors. Potential conflicts are highlighted. The reviewer is allowed to pick and chose from both authors to form the final artifact to be promoted. The task wizard creates one main task with two subtasks:
Two authors are working on the same task simultaneously splitting up the work. After completion two reviwers can indicate acceptance and provide comments to individual items of the particular artifact associated with the task. As a final step the adjudicator performs a review. The task wizard creates one task with the following configuration:
Two authors are working on the same task independently. They complete the entire task, and can not see what the other author is doing. After completion both reviewers can see the artifacts side-by-side for both authors. Potential conflicts are highlighted. Both reviewer can indicate acceptance and provide comments to individual items. For the final review the changed artifacts and reviews from both reviewer are presented to the adjucator. The adjudicator can either promote the changes to the main repository or reject them and reopen the task. The task wizard creates one main task with two subtasks:
Before creating a task, make sure that you set up a repository (e.g. Bugzilla). For further information please refer to the section in the User about Setting up a remote repository.
To invoke the task wizard, click the button
![]() in the Task view. Alternatively you can use the main menu: File > New > Snow Owl > New Task
in the Task view. Alternatively you can use the main menu: File > New > Snow Owl > New Task
On the first page of the wizard you are prompted to select
Hit Next to continue.
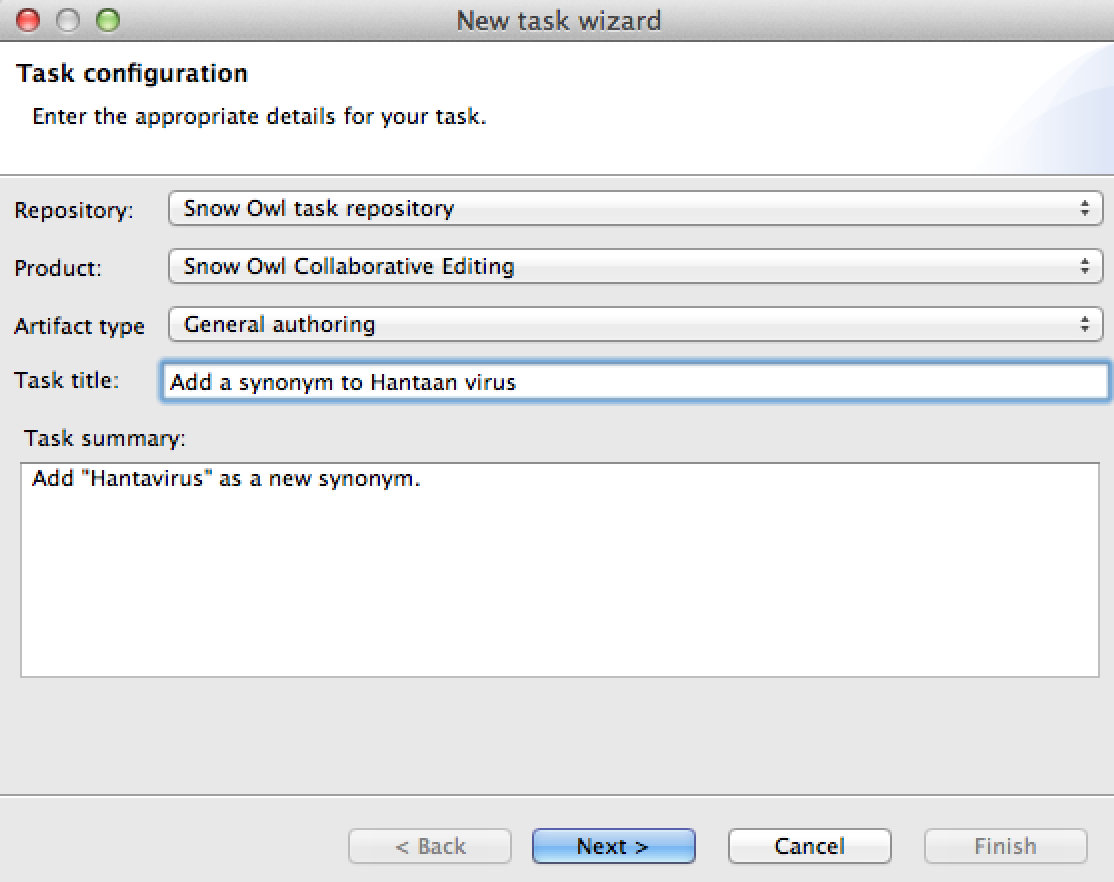
On the second page of the task editor for general authoring, you have to specify the
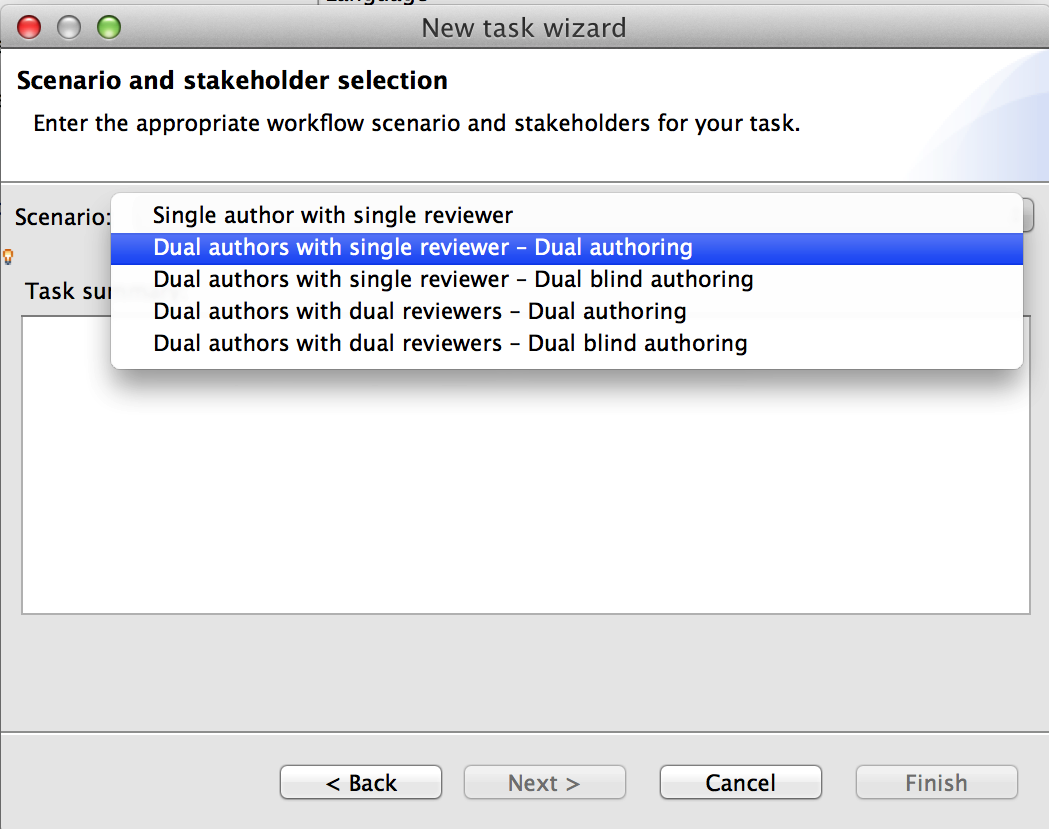
Dependant on the scenario you picked, the interface of the wizard will change making sure you specify all parties involved
Enter the email of the team members that will be working on the task. You can also use Ctrl + Space to display a list with email addresses. Hit'' Finish'' to complete the process. You can review your new task in the task editor that is launched upon completion.
On the second page of the task editor for reference set authoring, you have to specify if you want to
If you chose to create a new reference set, you have to specify
If you chose to modify an existing reference set, you have to specify the reference set you want to work on. Enter the name of your reference set, the quick search function will automatically come up and display matching reference sets.
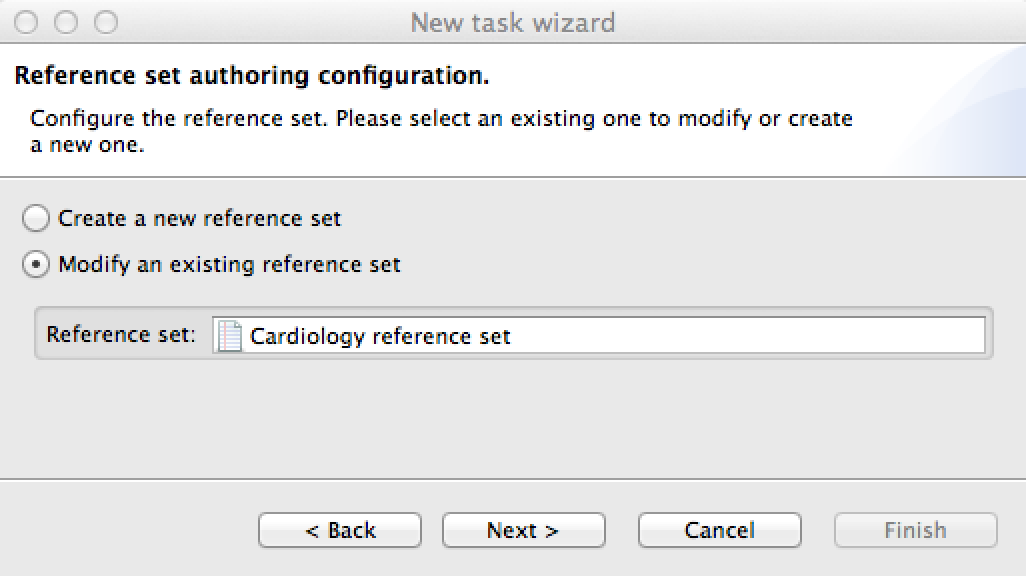
Hit Next to proceed. The following page of the wizard is similar to the one described in the section about general authoring. Select a workflow scenario, specify who will be working on the task, and add information about the task in the task summary. Click Finish to complete the task generation.
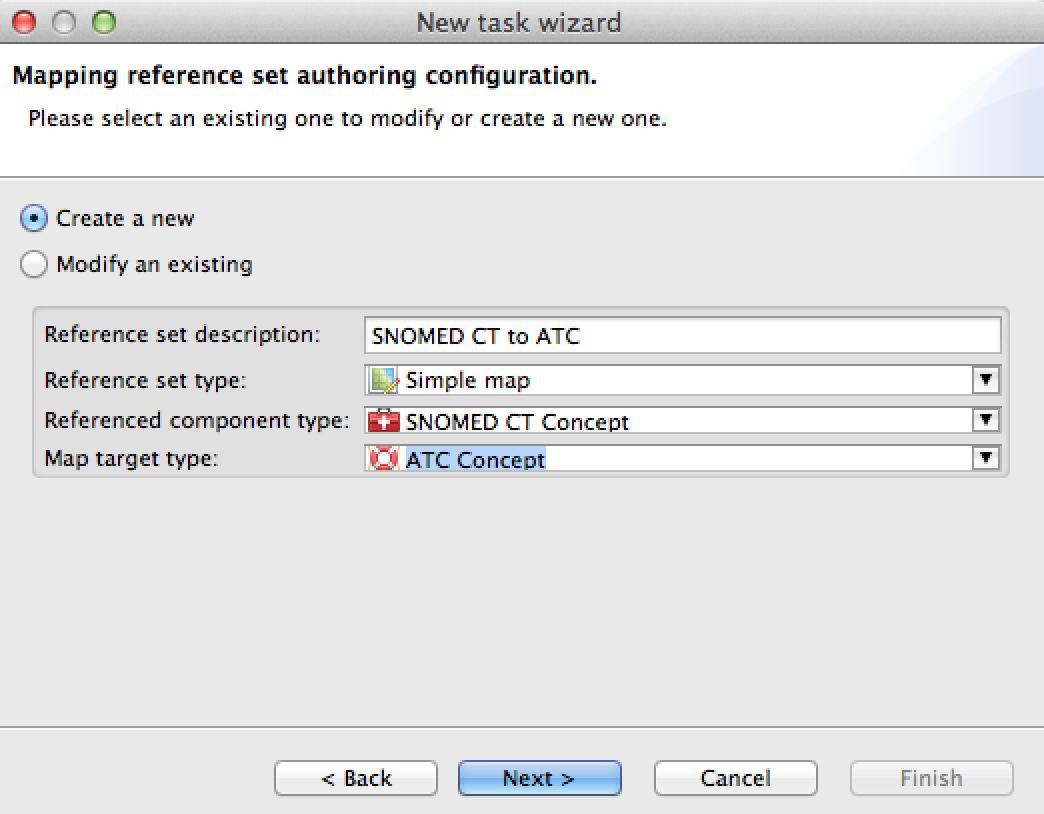
On the second page of the task editor for mapping reference set authoring, you have to specify if you want to
If you chose to create a new mapping reference set, you have to specify
If you chose to modify an existing reference set, you have to specify the map you want to work on. Enter the name of the map, the quick search function will automatically display matches.
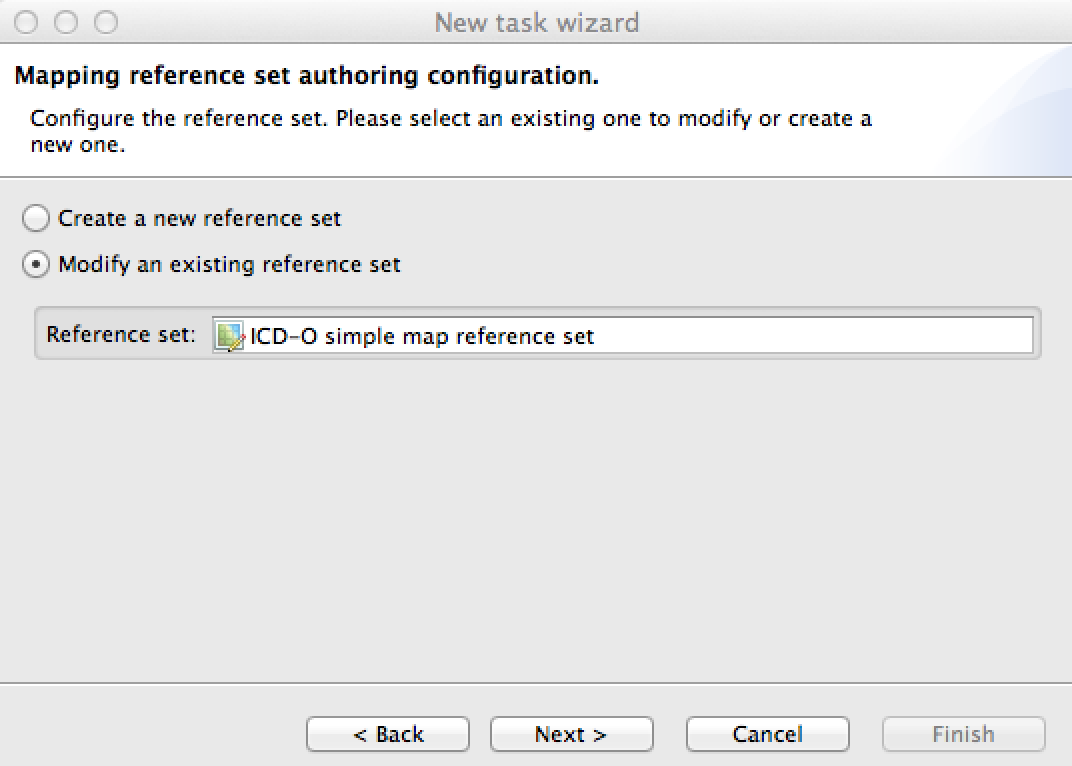
Hit Next to proceed. The following page of the wizard is similar to the one described in the section about general authoring. Select a workflow scenario, specify who will be working on the task, and add information about the task in the task summary. Click Finish to complete the task generation.
It's now possible for the reviewer to see the artifacts of both authors side-by-side. This way, you can pick and choose from both authors which artifact will be promoted. Pick and choose is only supported at reference set (simple or mapping) authoring, for concept authoring the reviewer has to approve or reject the whole work of the author. After completion of their work, the authors set their task state to Resolved. On the context tab, the reviewer can compare the work of the authors. Items can be accepted or rejected by clicking on the respective cell in the table.

Snow Owl now supports the creation of local code systems. The local code system navigator allows you to create new local code systems where each root node represents a separate local code system to group the local codes under. From the navigator you can add a new local code system or code to the hierarchy via an associated editor that allows you to specify additional properties. These local codes can later be referenced in value domains and mappings.
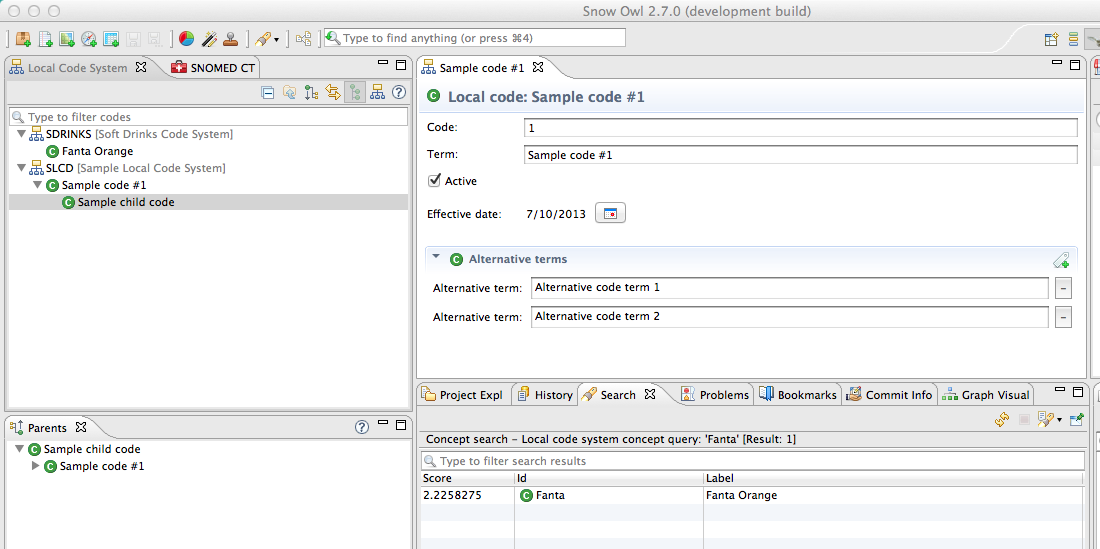
The created local code systems will be registered in Snow Owl's terminology registry.
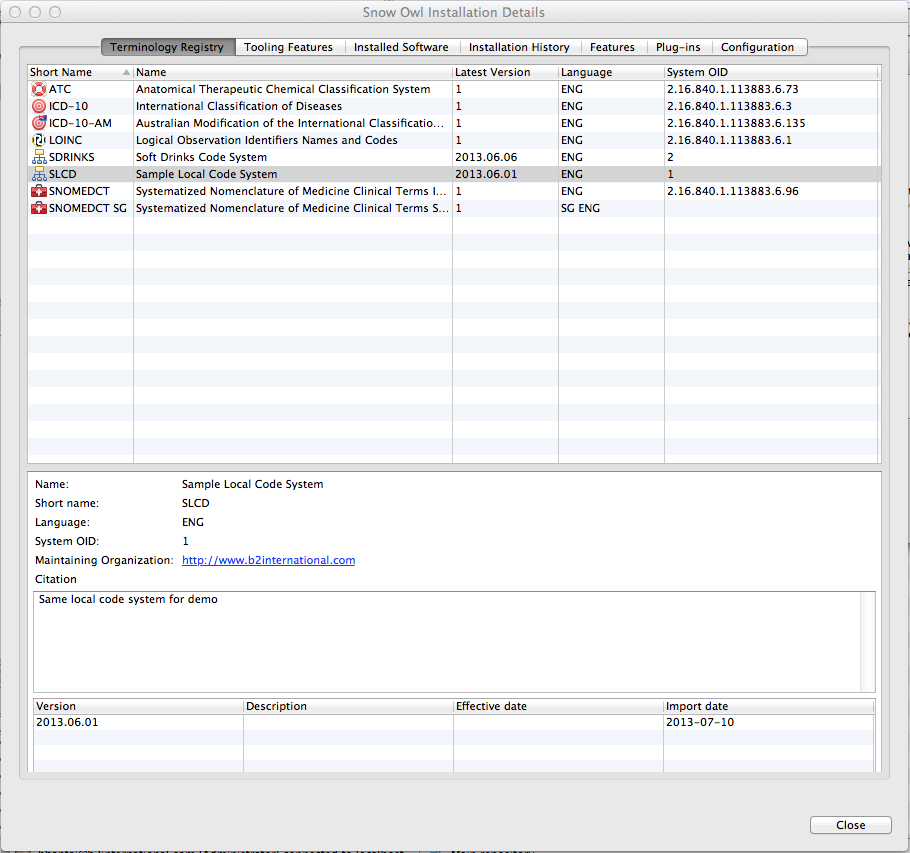
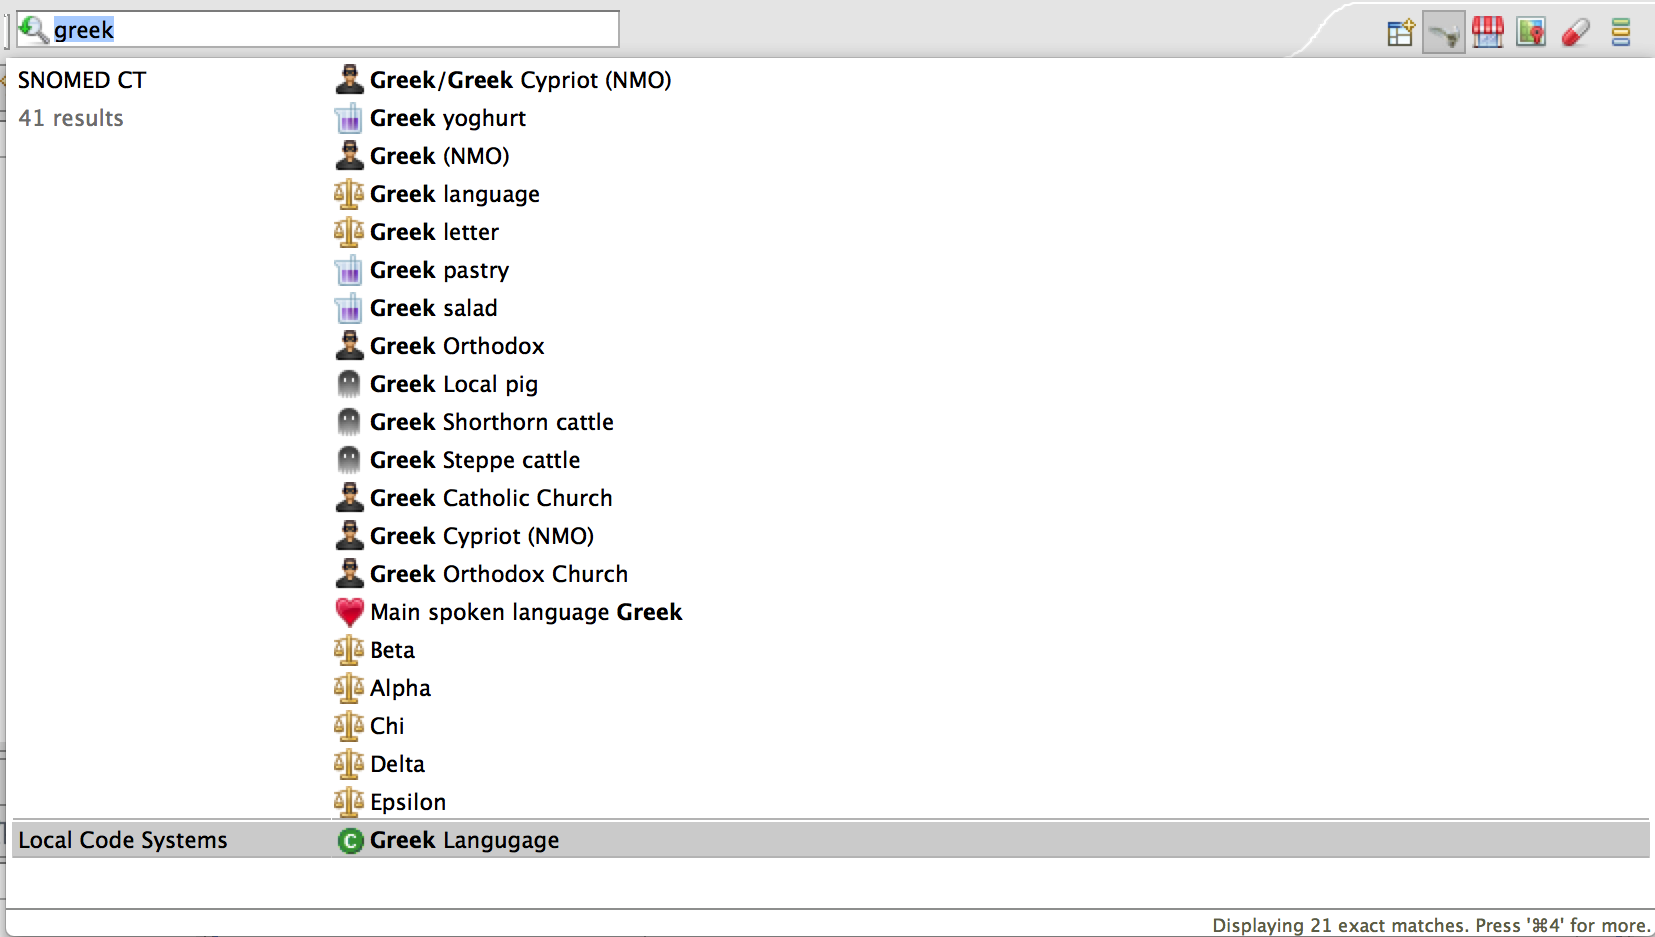
Similarly to other code systems supported by Snow Owl, you can search and browse these terminologies with a navigator or use the quick search widget or Snow Owl's advanced search utilities.
Note: There is no import/export functionality supported in this release, scheduled for v2.8. Local code systems are not yet part of Snow Owl's workflow, and are tested in standalone mode only.
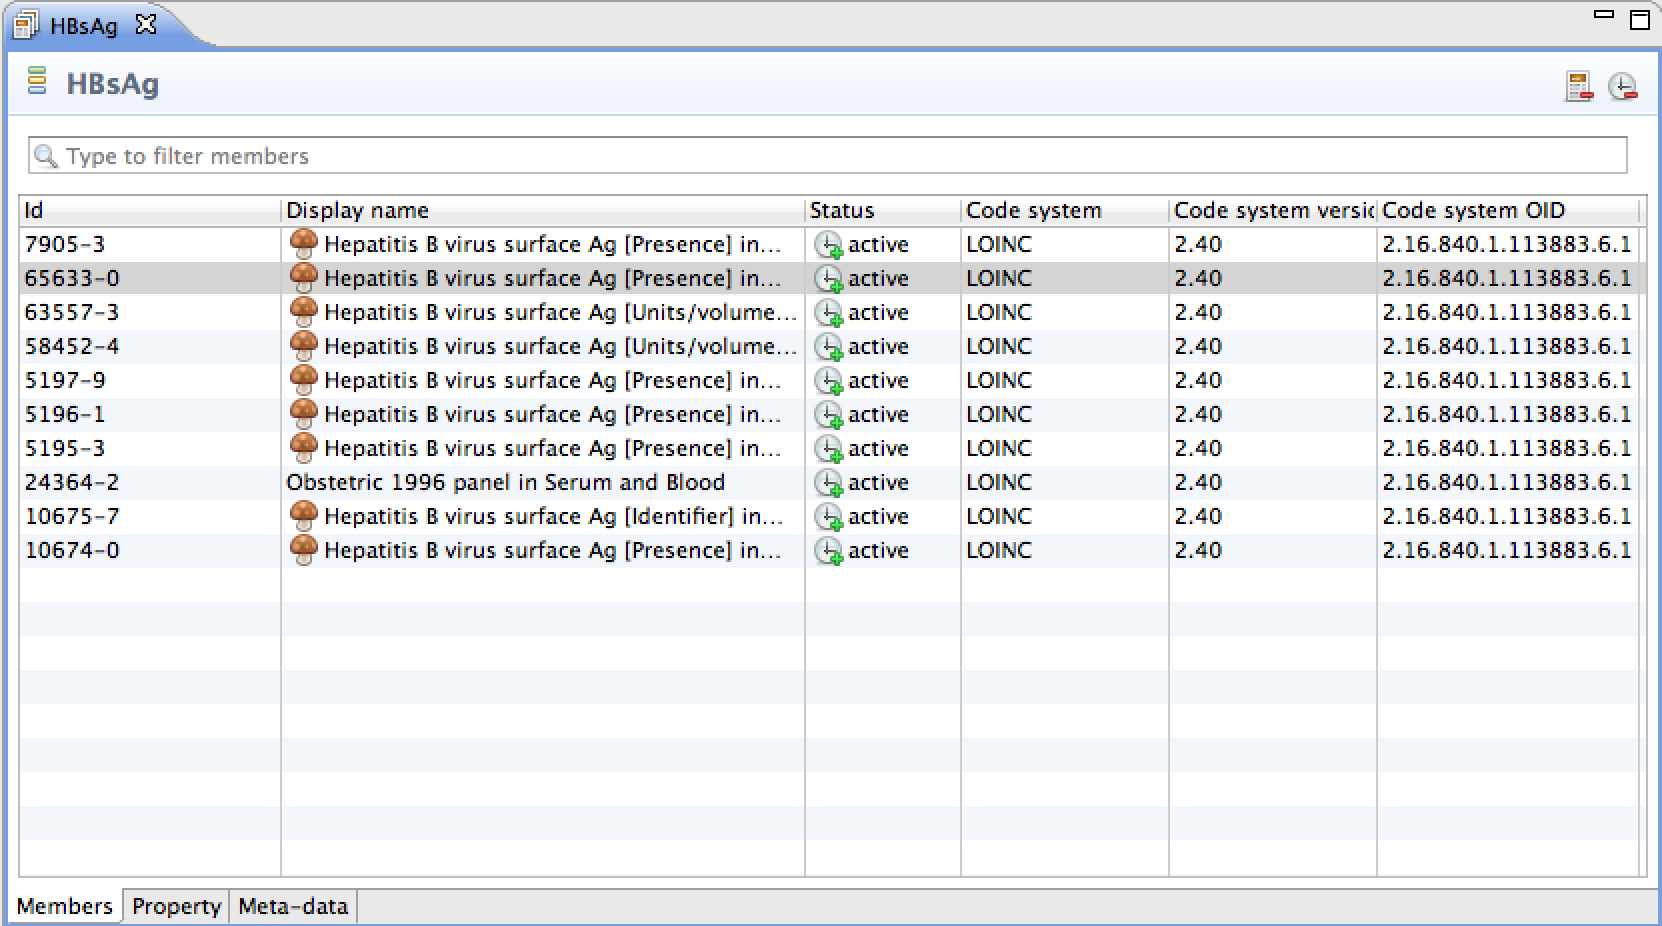
Snow Owl now allows creating value domains. These value domains contain references to different codes from different terminologies. Each value domain allows defining additional meta-data that is associated with that value domain. Value domains can be browsed and searched in the Value Set Navigator.
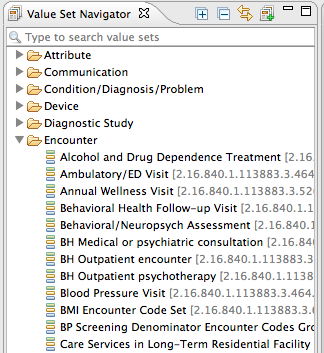
To view and edit a value domain, double clicking opens an editor.
Value sets in the SVS (Sharing Value Set) format can be downloaded from UMLS Value Set Authority and imported using Snow Owl's server command:
>valueset import #valueset_directory_path
Note: Value Domains are not yet part of Snow Owl's workflow, and are tested in standalone mode only.
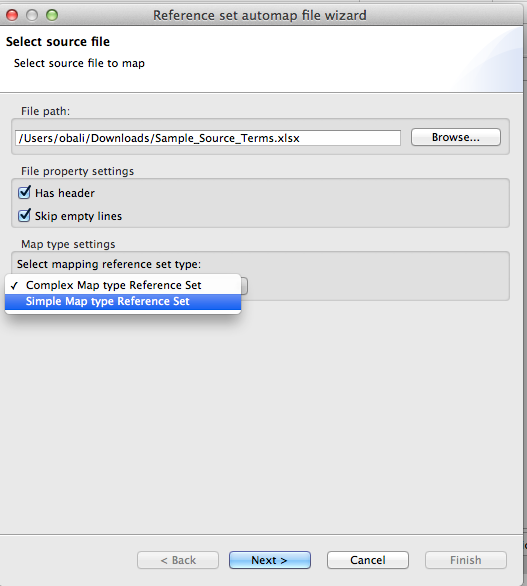
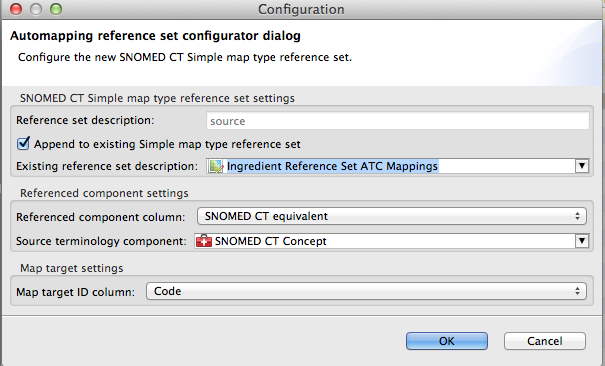
Automapping now supports the creation of both simple type and complex type mapping reference set. The target reference set has to be specified at the spreadsheet import.
After completing the mapping process in the automap editor, the newly created map reference set members can be added to an already existing reference set.
Mapping reference sets (both simple and complex type) can now be exported into value separated file format. The resulting table can be configured with the export wizard.
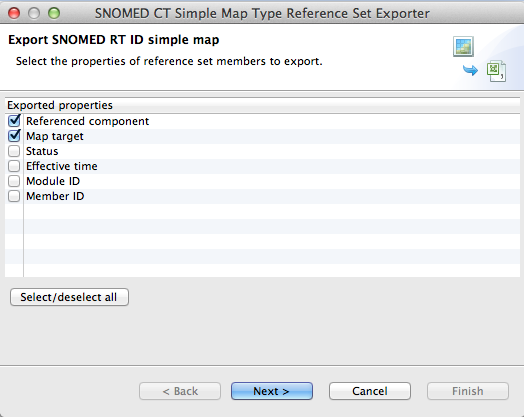
Tables can now be copied and pasted into Excel for future review or distribution. For copying, select one or multiple rows and use the Ctrl + C.
| Previous | Top | |
| Snow Owl 2.7 New and Noteworthy |